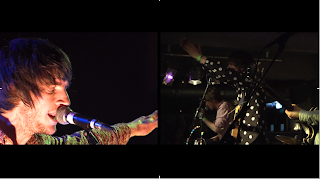
Below are a few screenshots that I have captured so far whilst editing.
The image above is a close up of the timeline. At the moment very few clips have been assembled together so there are a few gaps between the clips. The red line indicated how far into the footage you are. Where the clips are pilled on top of each other is where there is a split screen. To do this I put the two pieces of footage I wanted split screening on top of each other, then clicked on the top piece of footage and adjusted the motion setting. I dropped the scale from 100 to 50, so that the clip was exactly halve its previous size, and changed the position of the clip. The image below shows how I did this. Originally the footage was exactly in the middle, so I clicked on position and altered this. To move the footage to the left hand side of the screen I changed the position setting from 640 to 314, and to move it the right hand corner of the screen I changed the settings from 640 to 963. The next two images below are screenshot examples of split screens.
The image below is an example of how a split screen looks on the timeline. The clips with an image on indicate that they are film, and the clips with sound waves means that they are sound. When the yellow line in the video clip is at the top it means that the opacity is 100% which means that the clip is completely visible. Clip 00076's opacity is bar is down which means that the footage is not visible, but the clip underneath is because it's bar is at the top.
The image below and the image above are just examples of how the edit is looking, they both show split screens of live and studio footage which is showing a comparison between the two. Te image above is only showing one edited track, whereas as screenshot below is showing the Master Track, where all the edited pieces of footage are placed to that they can all be edited together.


No comments:
Post a Comment